Designing for 3d Printing – Layer Orientation
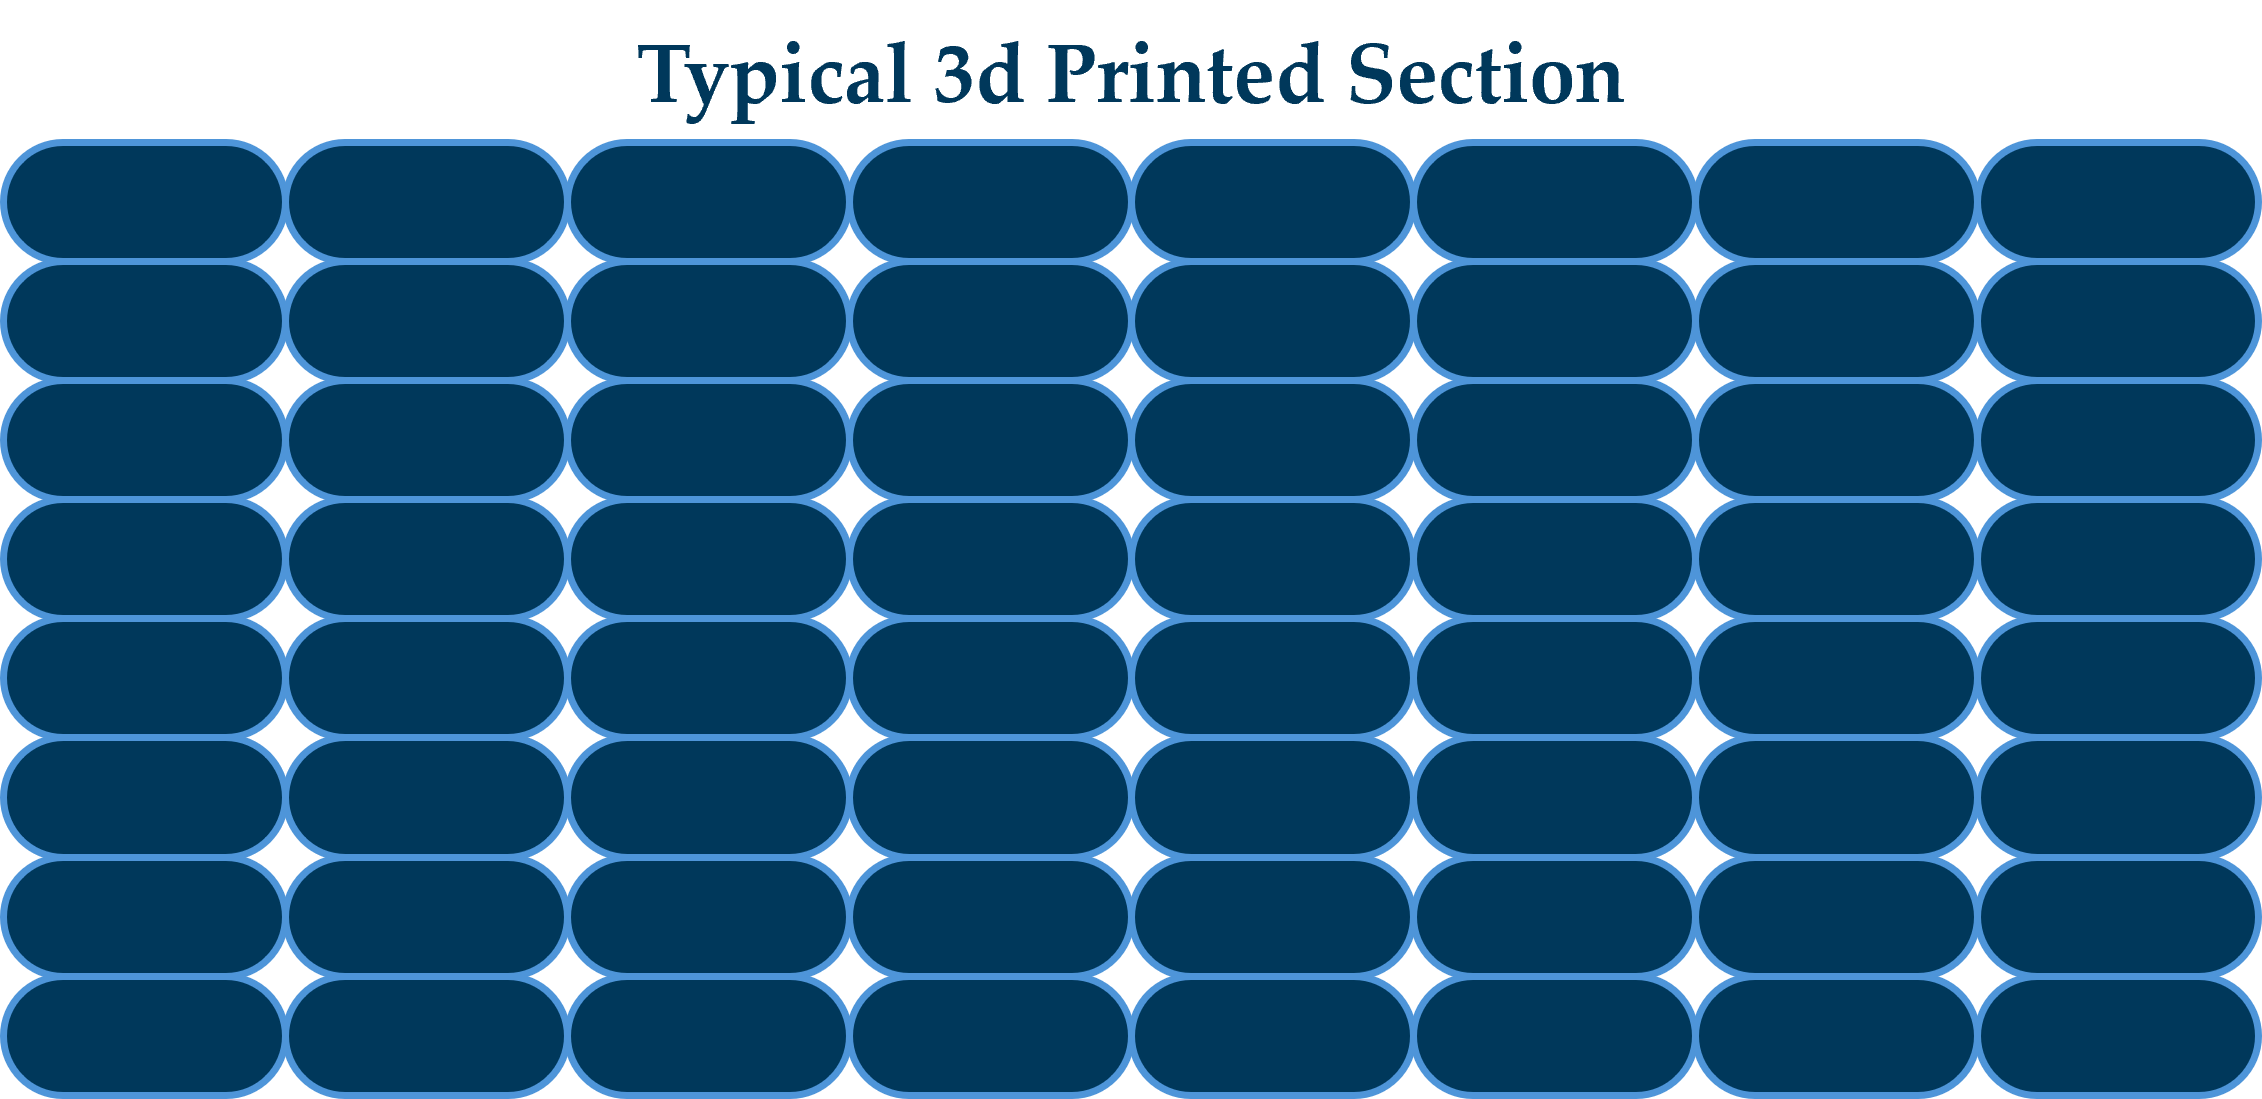
Selecting the correct layer orientation is a critical, strategic decision in additive manufacturing. This choice dictates a part's mechanical strength, surface quality, build time, and overall cost. The fundamental challenge stems from the anisotropic nature of most fused deposition modeling (FDM) parts, where the bond between layers is significantly weaker than the strength within the printed layer.
Optimizing Layer Orientation for Part Loads
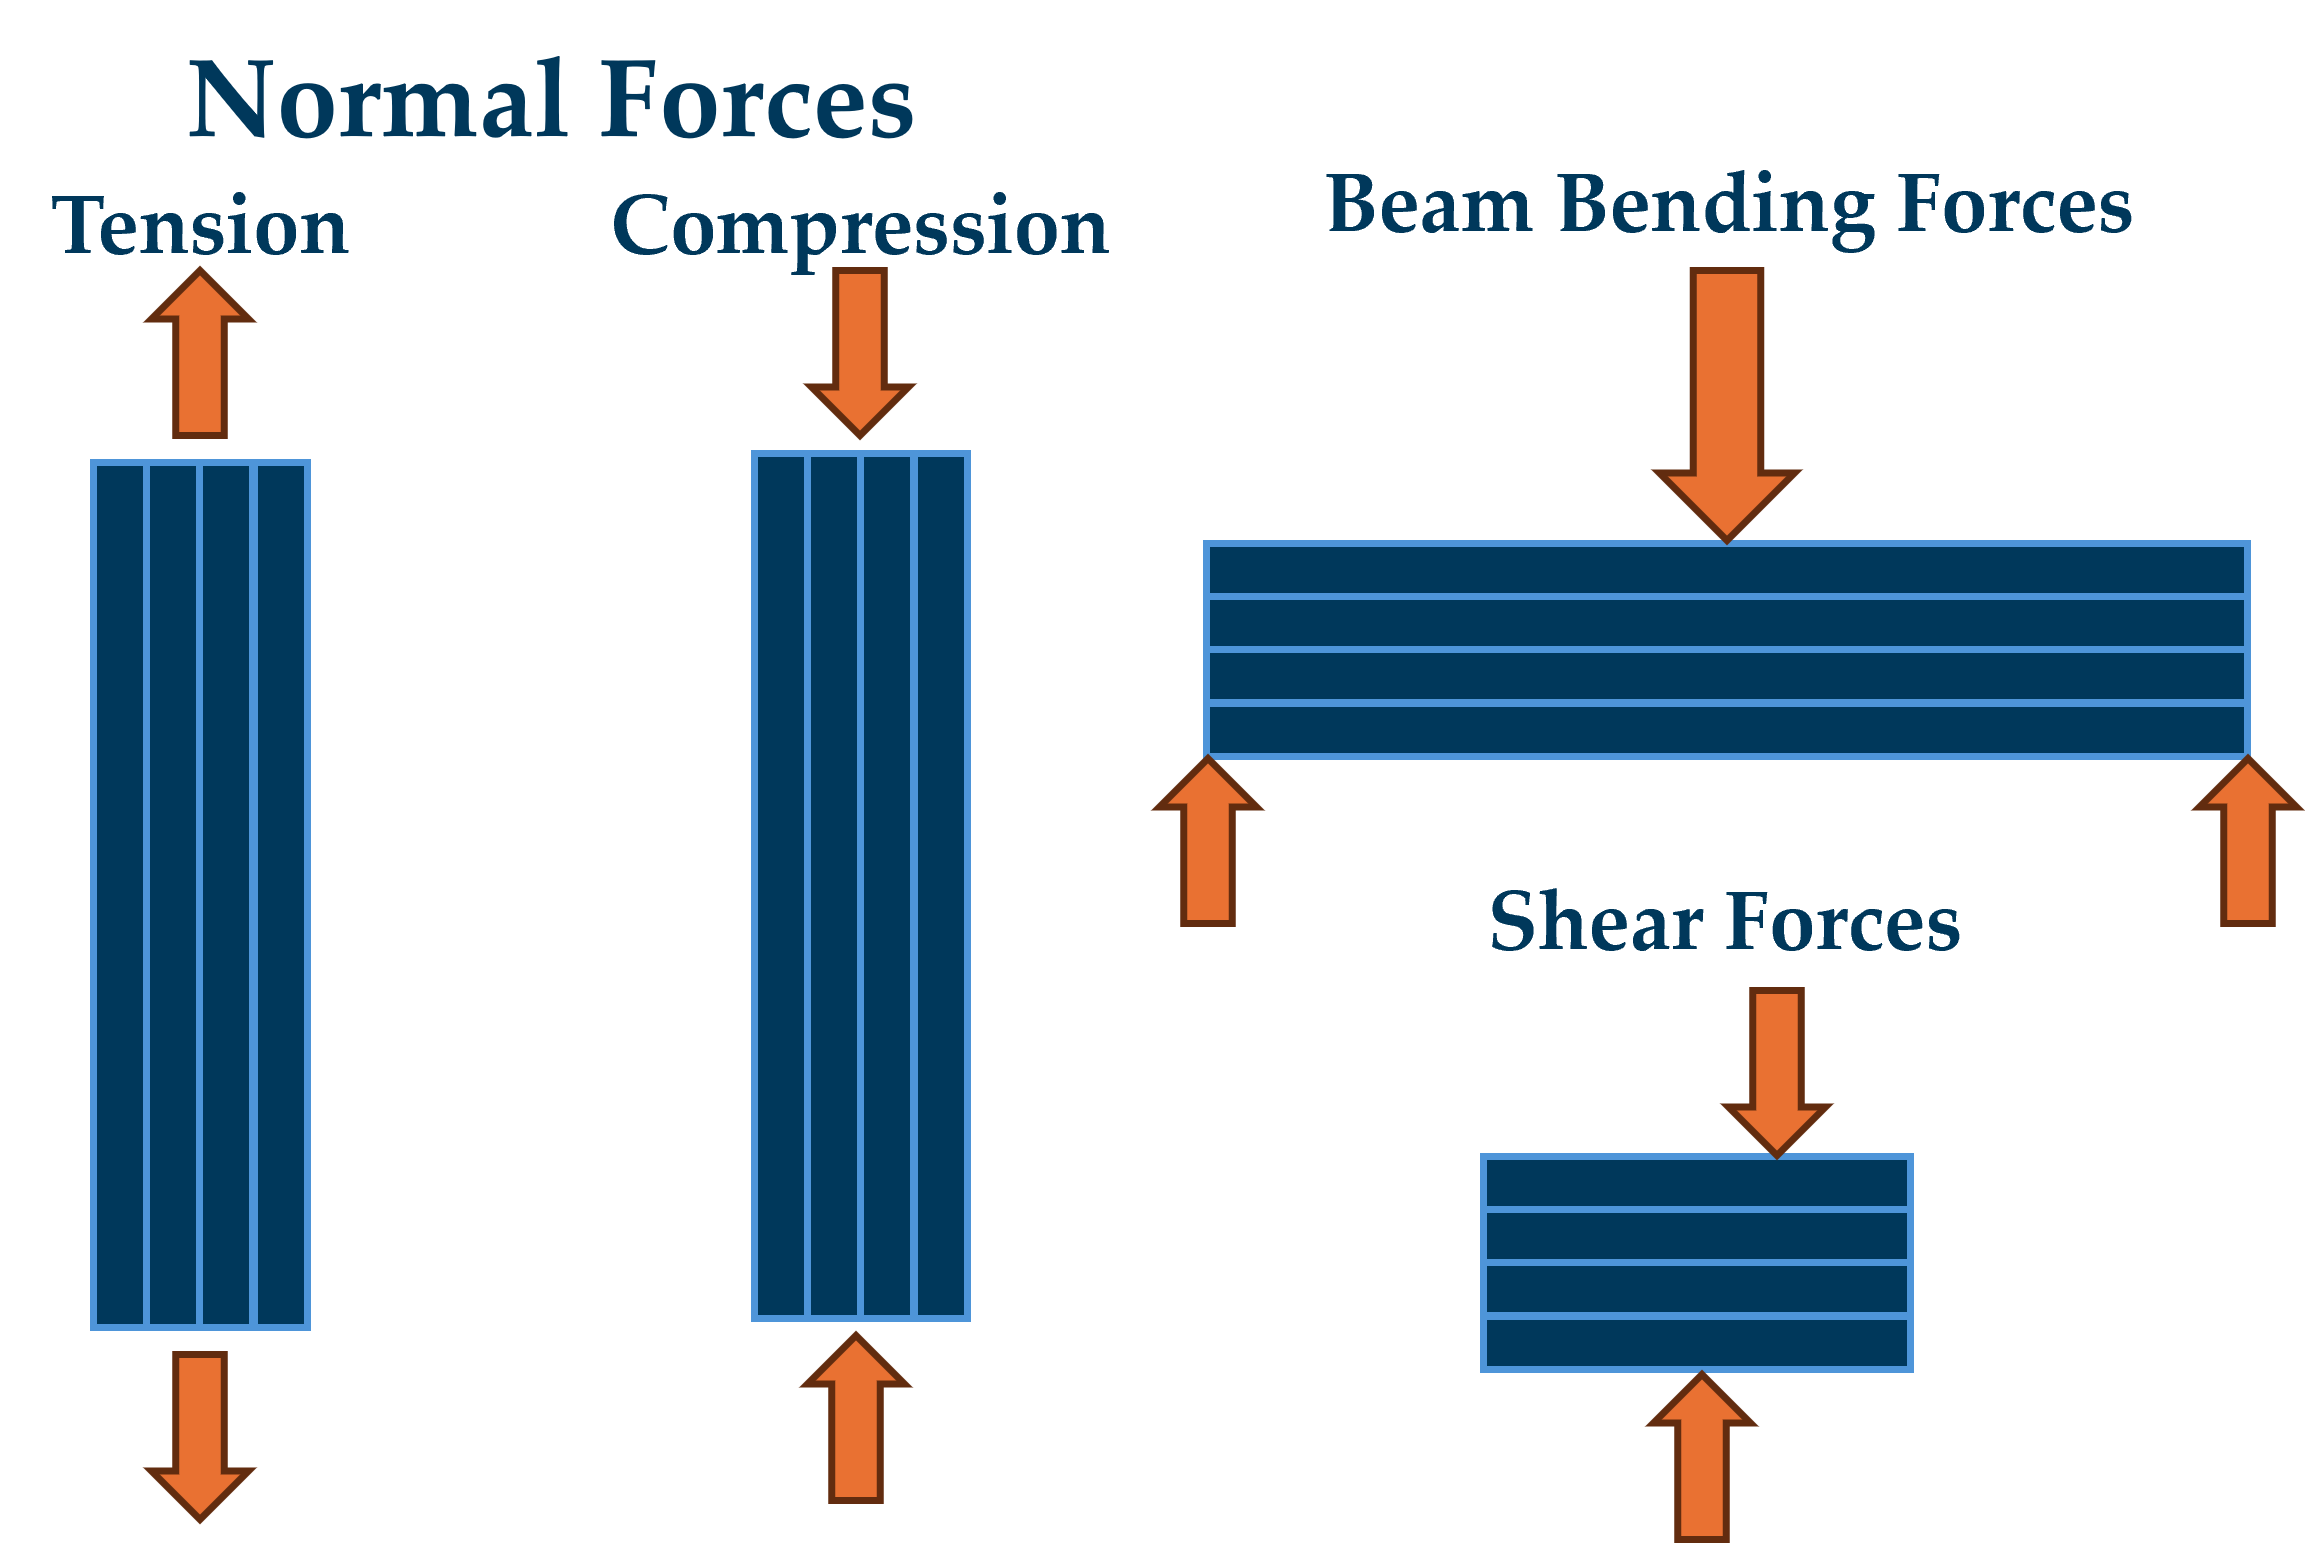
For functional parts it is critical to align the layer orientation so that the forces acting on the part load the FDM layers in the ideal direction. The ideal direction depends on the type of loading condition the part is expected to function in.

Optimizing Layer Orientation for Cost
The orientation of a part also has a direct, practical impact on the economics and quality of the print. The following effects drive cost in the final printed part:
Supports: Supports increase material usage, post-processing labor, print time, and the risk of damaging fine features during removal. Post processing is a significant cost driver of 3d printed products.
Print Time: Orienting a part to minimize its height (Z-axis) will reduce the total number of layers required, which can significantly decrease the total build time for FDM and SLA processes.
Surface Quality: Surfaces facing upward and on the sides of the print typically achieve the best surface finish. Surfaces that require support will exhibit support marks and may require post processing depending on cosmetic requirements.
Feature Clarity: Fine details and curved surfaces that are parallel to the build plate may show highly visible layer lines. Orienting curved surfaces vertically, on the print sides can improve surface quality, reducing post processing costs.
Warping/Thermal Stress: Large, flat surfaces and parts made of materials with high shrinkage (like ABS) are susceptible to warping due to thermal stress. Optimal orientation can improve part yield, reducing cost. Orienting a part at a slight angle (e.g., 10-20º) can reduce the cross-sectional area of any single layer, reducing shrinkage and improving part accuracy.
When to Split a Part into an Assembly?
While the ideal is to print a single, robust part, the realities of the 3D printing process often necessitate separating a design into multiple components that are assembled post-print. Demanding applications may require multiple layer orientations to achieve acceptable performance.
For example, a clip feature may require a horizontal orientation for strength, while a connection feature on the same part may require a vertical orientation for dimensional accuracy. In this scenario, it is more effective to split the design into two separate parts, print each with its own optimal orientation, and then assemble them.
Splitting a complex part with difficult internal cavities or deep overhangs can simplify support removal, cleaning, or post-processing, which ultimately reduces labor and cost. You can split a part to ensure critical internal or functional surfaces are positioned to minimize or eliminate the need for print supports.